Importing Images
Add new image assets into your Android and iOS applications
Introduction
The Image Importer utilities allows you to import image assets into the Android and iOS projects of your solution from a single image file, that is then imported with the correct size and aspect ratios for the given density buckets.
Using the Image Importer
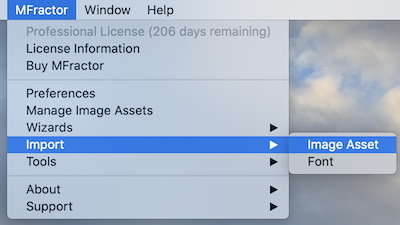
The image importer tool is presented as a dialog that can be invoked from several places in Visual Studio IDE. The more straightforward is from the MFractor main menu:
Important
The MFractor Image Importer tool menu option will only be available if the solution has at least one Xamarin.Android or Xamarin.iOS project.
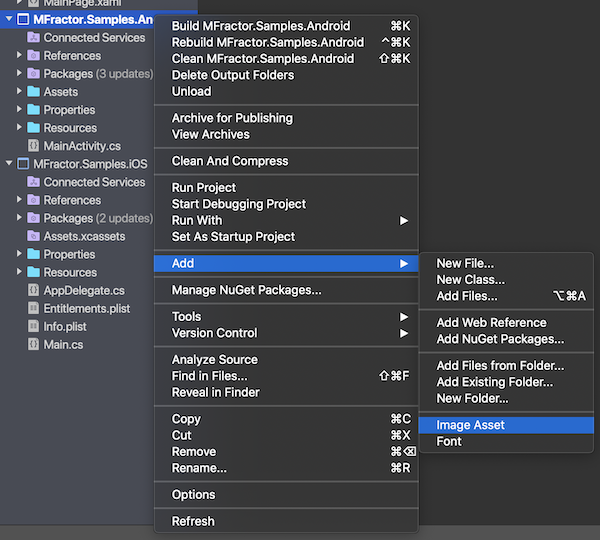
The tool can also be invoked from the context menu of an Android or iOS project, in the Add submenu you should find the option for Image Asset:
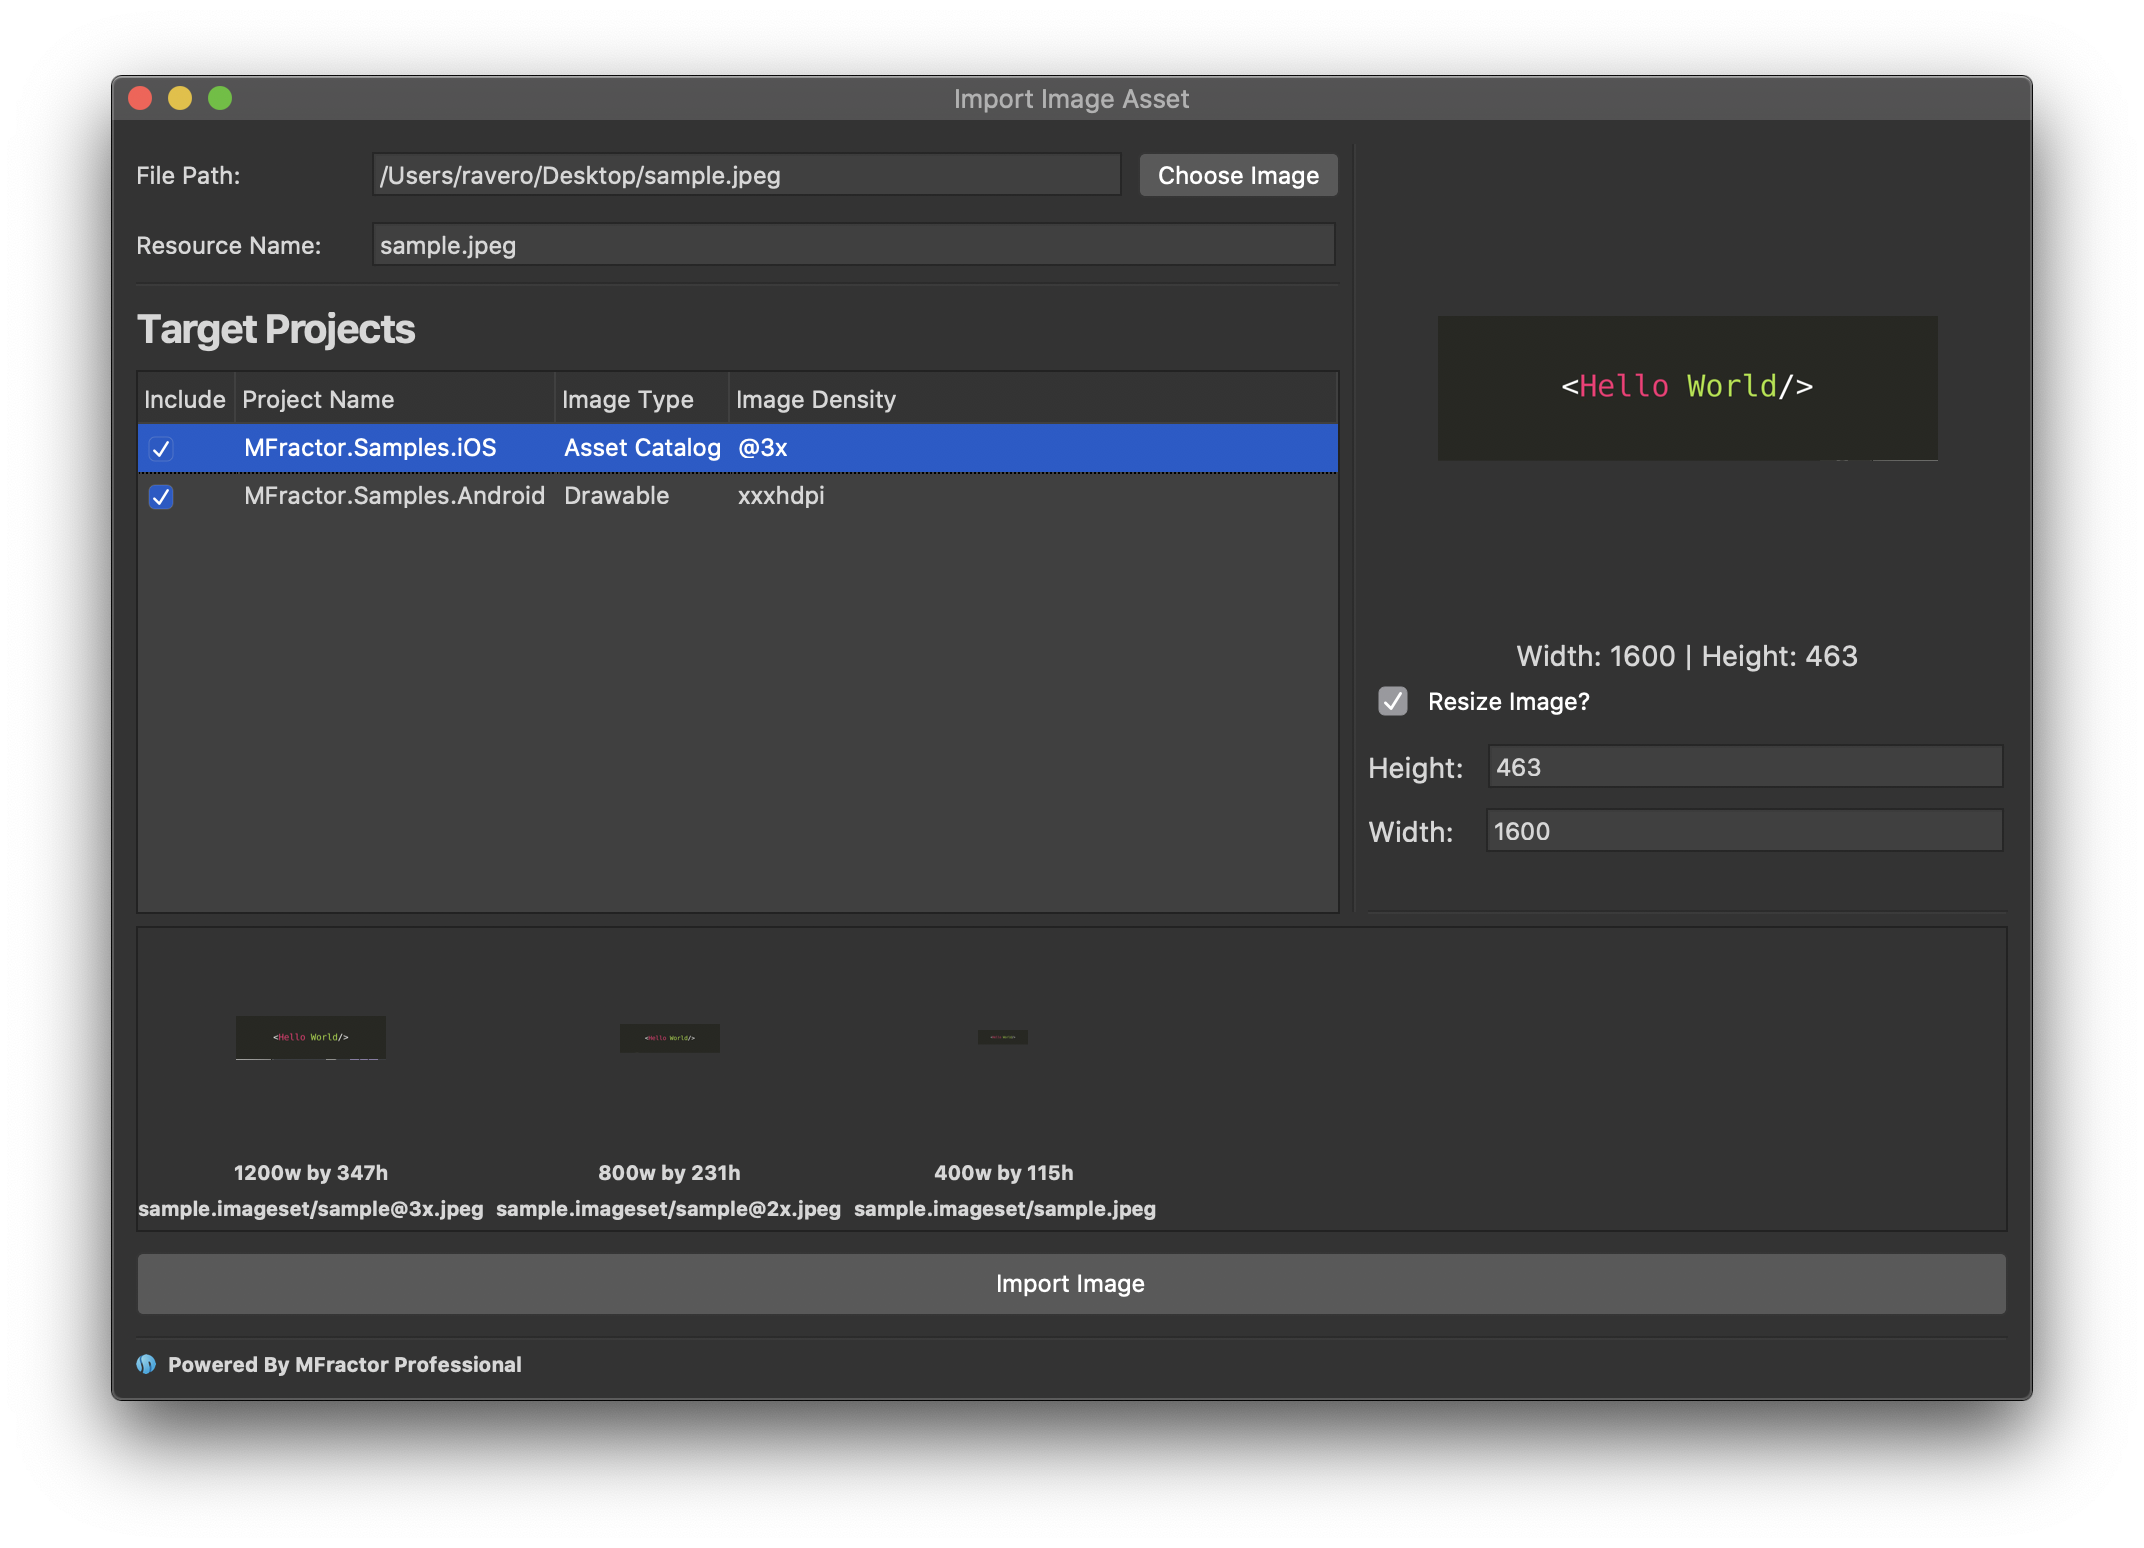
The Image Importer Tool dialog Window allows you to load a single image that you want to import to the project and then you can set the parameters for your import operation. First select the file you want to import, this will load it in the Preview panes:
Now you can customize how the import operation will execute. We will inspect the available options up next.
Target Projects
MFractor identifies the projects of type Xamarin.Android and Xamarin.iOS that can be import targets. By checking the Include box the image assets will be copied to the selected projects. There are several options that can be set for each of these targets:
- Image Type: depending on the Target Project you can select how the image will be imported:
- Android Projects can choose from
DrawableorMipMap. Drawables are the default option and MipMaps are commonly used for application icons. In both cases the tool will import images to the corresponding density bucket folder. - iOS projects can choose from
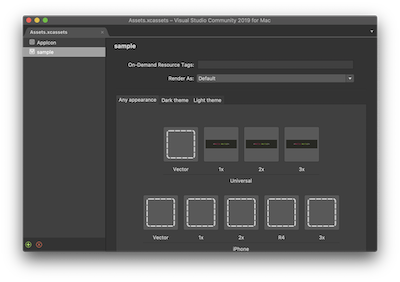
Asset CatalogsorBundle Resources. Images imported to Asset Catalogs will be added toAssets.xcassetscatalog that is created by the default Xamarin.iOS project template. Bundle Resources images are copied to theResourcesfolder of the project. In both cases the entries are automatically added to the.csprojwith the corresponding Bundle Action to ensure they'll be correctly compiled to the application package.
- Android Projects can choose from
- Image Density: also dependant on the Target Project, you can select the maximum image density for the target platform. The tool will automatically add all the images from down to the lowest density on that platform. Options are:
- Android:
xxxhdpi,xxhdpi,xhdpi,hdpi,mdpiandldpi. - iOS:
@3x,@2xand@1x.
- Android:
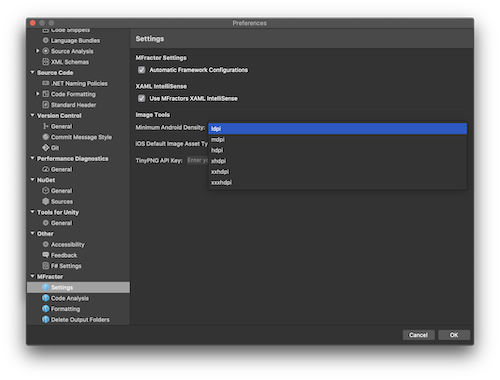
MFractor provides a system-wide configuration to set the minimum image density to which you want Android image assets to be imported. This option is presented in the Settings pane in the MFractor section of Visual Studio Preferences:
This pane also allows setting the Default Image Asset Type for import iOS images.
Setting the Image Size
The image importer tool will detect the image dimensions and automatically suggest it as the image size for the import operation. This size determines how big will be the image on the maximum selected bucket for any of the target projects. MFractor then scale down the images to the correct sizes of each bucket on each target project/platform.
It's important to understand how densities sizes are calculated in order to correctly apply the size options for your needs. Currently, the platforms work with densities as of the following table:
| 0.75x | 1.0x | 1.5x | 2.0x | 3.0x | 4.0x | |
|---|---|---|---|---|---|---|
| Android | ldpi | mdpi | hdpi | xhdpi | xxhdpi | xxxhdpi |
| iOS | N/A | @1x | N/A | @2x | @3x | N/A |
There you can see a correlation between density multipliers and the density bucket on each platform. We can see that Android provide several more densities than iOS although most of them are equivalent between platforms. Also Android provides an maximum higher multiplier of 4.0x that iOS doesn't implement. This is important to understand how image sizes are calculated on the image importer tool.
On the bottom pane of the importer dialog window you can preview how the images are going to be imported on the selected target project. The sample image from the following screenshot is a 1600x463 banner. If you check the preview pane of the Android target you will notice that its going to generate a image for each of the densities listed above, applying its multiplier to determine the correct image size:

When you select the iOS project, you will notice that there's way less densities to manage, and also that the bigger density is smaller than the image size:
This happens because the selected maximum density of the Android target project is greater than the maximum density of the iOS project, so the tool automatically downsizes it to keep the image sizes consistent between platforms. If you set the Image Density of the Android target to xxhdpi and check back the preview pane of the iOS target, you will notice that the maximum density will preserve the maximum size of the image.
Import Image
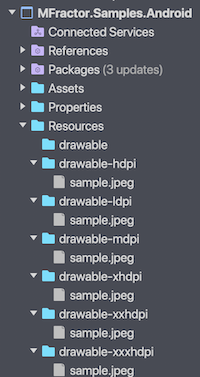
When you're satisfied with the settings you can import the image by clicking on the Import Image button. MFractor will generate and add the images to the projects you've set as target. Check the projects to verify the results: