Managing Images Assets
A centralised location to easily manage the image assets in your mobile solution
Introduction
The image asset manager summarises all image assets across your solution from your iOS and Android projects.
As a developer, you gain a birds-eye view of all image assets in your solution and that then allows you to delete, import, search and optimise all images from a centralised location.
Opening The Image Manager
The image manager is presented as a pad on the IDE by default on the right side of the Window, below the Toolbox, Properties and Document Outline pads. You can access it from several places if hidden:
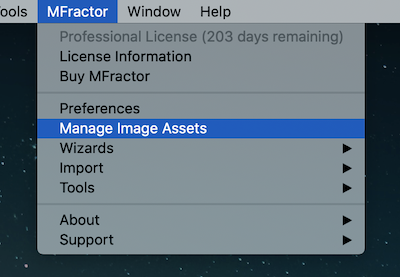
Top Menu
By acessing the top menu selecting the Manage Image Assets options.
Solution Pad
You can right click on a Xamarin.Android and Xamarin.iOS project file and you'll find Manage Image Assets under the Tools menu.
Alternatively, double click on and Android or iOS image asset. This will open the image manager, selecting that image in the list.
Overview
What is an image asset?
MFractor works with the concept of Image Assets, where a single asset is composed by a set of files that represent a single image at each possible density supported by Android or iOS devices. This concept is implemented to facilitate managing those assets, because a single item may be represented by a large number of individual files, that can also be shared among projects.
For this documentation, every time we use the term Image Asset, we are refering the set of images that form a single element as consumed by the user interface engines of the platforms, and we will use the term Asset File to refer to a specific item of this set.
The Image Manager Pad is composed of the following parts:
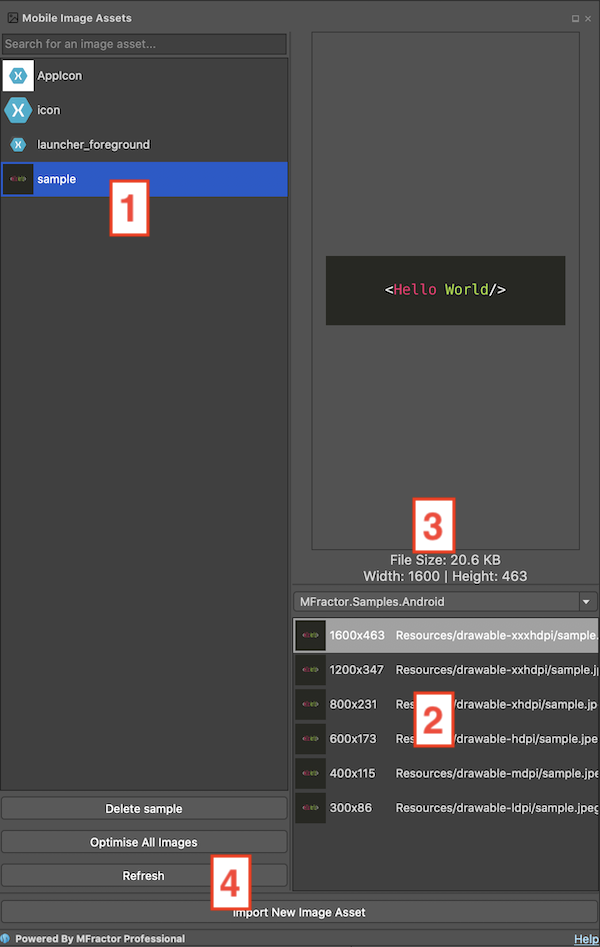
- The Assets List: the main listing on the left side of the pane contains all the image assets identified by MFractor in the current solution. The list consider an asset a set of images that compose a single image as recognized by an Android or iOS project.
- The List of Assets File: when you select an asset from the previous list, MFractor will list the files that compose this asset in this section. Further grouping is provided by project on the Combo Box on the top of this list, where you can select the project of which you want list the files of the asset. The list provides the image size aside with it's path in the solution.
- The Preview Area: just above the listing of asset files on the Asset, you'll find the preview of the currently selected file along with some metadata of the image: it's current file size and dimensions.
- The Commands Area: you'll find buttons for the commands available to the image assets on the bottom area of the assets listing.
Filtering Image assets
You can filter image assets using the search bar on the top of the listing. Start typing and MFractor will filter the items that contains the text you've typed.
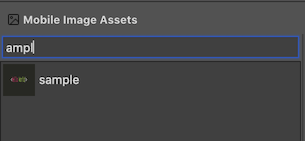
Note
The filtering tool is case-sensitive.
Importing Image Assets
Click on the Import New Image Asset on the bottom part of the pad to open the Import Image Asset tool. See the section docs for instructions on how to import images.
Deleting Image Assets
You can delete an Image Asset by selecting the image on the assets list and clicking on the Delete image name on the bottom of the listing. This will present the Delete Image Asset tool dialog, that previews the delete operations that will be run for that asset.
You can also right click on a asset of the list and select Delete from the context menu.
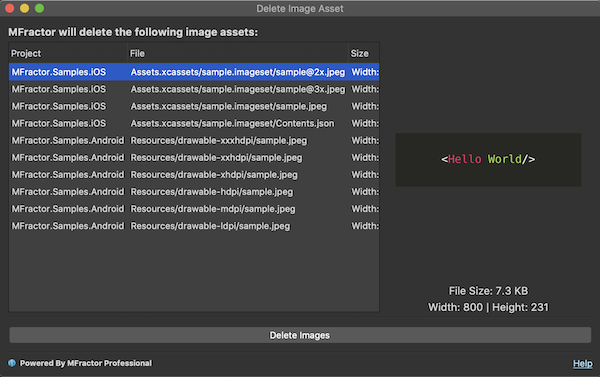
Click Delete Images button to confirm the operation.
Tip
For further information about the MFractor Delete Image Asset tool see the docs of the feature.
Optimising Image Assets
Through the Image Asset Manager you can optimise the all images of your solution, a single Image Asset or a specific Asset File. Please check the Optimising Image Assets docs for details on how to setup image optimization and launch it for the desired items of your solution.
Searching For Image Asset Usages
The Image Asset Manager allows you to search for places where an Image Asset is referenced in your solutions code.
Warning
This feature is currently in preview and will search for the exact name of the asset. This may not detect all usages of this image resource and may detect false positives.
To Invoke the Search Usage feature you should use the context menu over the Image Asset you want to do the search and select the Find Usages option. MFractor will present the results on the Search Results Pane on the bottom area of the IDE.

Drag And Drop
The image manager supports drag and drop from the image asset list onto a code file.
When you drag and drop an image onto a code file, the image manager will generate code to access that image.
For example, given the image logo.png, MFractor will insert the following code:
- Android AXML:
@drawable/logo. - Android C#:
Resource.Drawable.logo. - XAML:
logo. - C# (Xamarin.Forms):
"logo.png";
Context Actions
In both the Image Assets list and the Asset Files list, you may right click on any item to launch a context menu that may provide the following options:
Delete
Please see Deleting Image Assets
Reveal In Finder/Explorer
The Reveal In Finder action will open Finder (Mac) or Explorer (Windows) and select that image.
Reveal In Project Pad
The Reveal Project Pad action will locate the image file in the solution pad.
Copy Name To Clipboard
The Copy NameTo Clipboard action copies the full file path of that image file to the clipboard.
Copy File Path To Clipboard
The Copy File Path To Clipboard action copies the file path of that image file to the clipboard.
Optimise
Please see Optimising Image Assets
Open Image
The Open action opens the selected image file in the operating systems default image viewer.
Search For Usages
Please see Searching For Image Asset Usages