Convert StackLayout to Grid
Quickly convert a StackLayout to a Grid for refactoring and expanding your layout.
Introduction
StackLayout is one of the basic layouts provided by Xamarin.Forms and is a common starting point when composing a new view, being fast and easy to use. But it's common to transform a StackLayout into a Grid when the layout starts to become complex, or you need to rethink it to have new column or row.
MFractor makes easy to convert an existing StackLayout into a Grid with the adequate rows and columns definitions and its elements in place.
Using the Converter
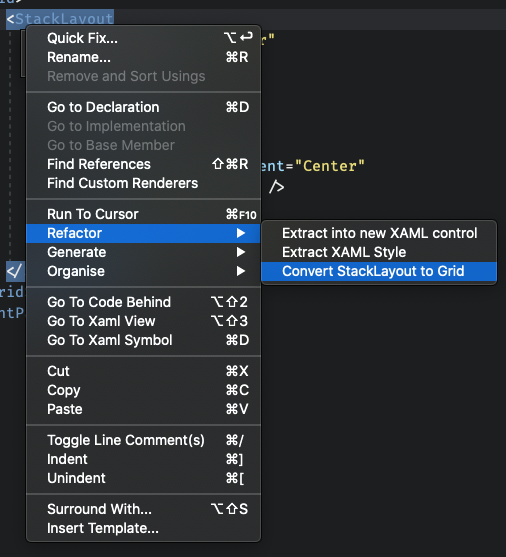
The Convert StackLayout to Grid tool is presented as a XAML Code Action. The option becomes available to the Refactor menu on the Context Menu of a StackLayout element.
Consider a layout for reporting progress to the user. It's composed of an ActivityIndicator, a Label and Button stacked vertically:
<StackLayout>
    <ActivityIndicator
        IsRunning="True" />
    <Label
        HorizontalTextAlignment="Center"
        Text="Processing..." />
    <Button
        HorizontalOptions="Center"
        Text="Cancel" />
</StackLayout>
We may want to transform it into a Grid, so we can add a second column to add new button button to right of the current one. Right-click on the StackLayout element and on the context menu you should find the option Convert StackLayout to Grid on the Refactor menu:
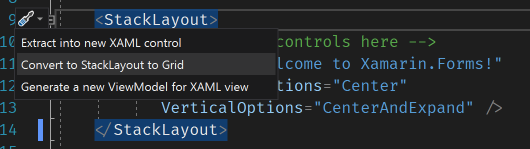
In Visual Studio for Windows this code action will appear in the quick fix menu, the little screwdriver icon that appears to the left of the current line being edited. If you place the cursor under a StackLayout declaration and click on the icon or use the Ctrl + . keyboard shortcut, the option will appear o the menu:
Note
The current verison of MFractor for Visual Studio Mac doe not support quick fix actions in XAML, however, this feature should be available in a future version.
By applying this code action, your StackLayout declaration will be transformed into an equivalent Grid declaration, just like below:
<Grid
    HorizontalOptions="Center"
    VerticalOptions="Center"
    Padding="12">
    <Grid.RowDefinitions>
        <RowDefinition Height="Auto"/>
        <RowDefinition Height="Auto"/>
        <RowDefinition Height="Auto"/>
    </Grid.RowDefinitions>
    <ActivityIndicator
        Grid.Row="0"
        IsRunning="True" />
    <Label
        Grid.Row="1"
        HorizontalTextAlignment="Center"
        Text="Processing..." />
    <Button
        Grid.Row="2"
        HorizontalOptions="Center"
        Text="Cancel" />
</Grid>
The conversion to Grid will keep all the properties previously applied to the StackLayout on the trasformed grid declaration. Depending on the Orientation property, the ColumnsDefinitions or RowDefinitions will be created to match the number of elements in the stack. For Vertical (the default) stacks row definitions will be created and for Horizontal column definitions will be created. The conversion will also add the correspondent Grid.Column or Grid.Row properties on the child elements.
The conversion will also verify the VerticalOptions (for vertical stacks) or HorizontalOptions (for horizontal stacks) Exapnsion option of each child element to determine the column width or row height of its corresponding position:
- For elements that Expand, the row or column defitinion will apply the
*size - For elements that doesn't declare the Expand, the row or column defiition will apply the
Autosize
Note
There's no reverse operation of StackLayout to Grid conversion. If you need to revert the operation you should use the Undo command of the editor. We recommend that you keep a history of your source code so you can track back after the conversion if you need.